Showing posts with label Gardening. Show all posts

Sunday, August 16, 2015

Tips for Growing a Tillandsia Air Plant

For the past few months I've been growing and taking care of several Tillandsia Air Plants. One of the things I love about them is that they are easy-to-grow, require very little care and they take up very little space! They are great little plants for those who live in apartments, RV's, travel trailers or put one on your desk at the office.

The official name for these plants is Tillandsia but many people refer to them as Air Plants because they need very little water to survive and need partial sunlight. In my planters...I have them hovering above some natural beach sand as I like that look the best.

Tips for Growing a Tillandsia Air Plant

* They need very little water! When watering...remove them from your container and turn them upside down. Place some bottled spring water into a misting bottle and lightly mist the plant. Once misted, lay it upside down on a paper towel to air dry. Once dry...place it back into your container. You NEVER want to use tap water (chemicals) or distilled water. They thrive best with spring water. When it comes to the frequency of watering...you only want to "mist" them a tiny little bit every week. Do NOT over-water!

* The Tillandsia Air Plant needs partial sun for 2-3 hours every day. This sunlight can be morning or evening sun. It's best to avoid hot afternoon direct sun which can kill them. Walk around your home and look for a window that gets partial sunlight for a couple of hours per day. That would make the best spot for your air plant.

* The optimum temperature range for this type of plant is 50 to 90 degrees F. If you live in a colder climate you may want to relocate your air plant to a different room in the home if that particular window gets cold drafts. Do not try growing this plant in a hot attic, hot sun room or damp, wet basement area.

* I like to grow mine in clear glass containers (like a fish bowl) and place small natural objects inside. The one I am showing in the photo above is in a glass fish bowl with natural beach sand, a tiny starfish, 2 small sea shells and a small piece of natural coral. You can add any natural objects that you would like! Avoid using "craft" sand that you find at your local craft supply stores! 

Growing the Tillandsia Air Plant is a really easy thing to do! They are hearty little plants that do well in most areas of your home. They require very little care and take up very little space! You can get creative with your plant containers and the items you put inside with them. A great houseplant for those with a "brown thumb" to try! 

Sunday, July 5, 2015

7 Container Plants to Help Repel Mosquitoes

We have a semi-large suburban property that is bordered on two sides by a tree line. Behind our property about a 1/2 mile is a small pond that seems to attract all kinds of wildlife and bugs. Mosquitoes have been a big problem in this area and it seems we are always getting bitten up, especially during the early morning or late evening hours.

I did some extensive research online and talked to a local gardening expert who educated me on some container plants that I could place around my patio, deck and front porch to help repel mosquitoes. I wanted plants in containers so that I can move them around our yard when we are entertaining family and friends.

Here are 7 Container Plants to Help Repel Mosquitoes. All of these plants are readily available at your local garden center or neighborhood nursery.

1. Citronella

2. Rosemary

3. Lemon Balm

4. Basil

5. Catnip

6. Lavender

7. Marigold

What I love about these plants is that many can do double duty in your garden. For example: The Rosemary and Basil can be used in the kitchen when you are cooking. The Lemon Balm, Marigold and Lavender are great in homemade bath, body and beauty products. Matter of fact, you can find some great DIY beauty recipes right here on my blog that call for those ingredients.

You can plant these plants in any containers that you would like. I used plastic planters, metal sand buckets, old metal watering cans and even an old metal mop bucket. The containers also added some interest and appeal to your garden decor and landscaping.

When the growing season is over here in the northeast, I remove my plants and save my gardening containers in our backyard shed for the next growing season. No need to go out and buy new containers!

We've had great success by planting these plants in containers to help repel the mosquitoes. We move them all around the yard, depending on where we are gathering, working or playing that day. It's been a great solution for us and we haven't used any nasty bug or pest repellents this year.

Monday, June 29, 2015

Gardening Tip: Use Old Bird Bath as Flower Planter

I love bird baths and have quite a collection of them. Someone is always giving away their bird baths and they always pawn them off on me. In my backyard you will find 3 of them set up as a traditional bath for the birdies to enjoy. However, I have several others spread out around our property and use them as flower planters too!

The one shown in my photo today is on the smaller side. It is a 2-piece bird bath that was in terrible unfinished condition when I got it. I gave it a good scrubbing with bleach and water. I then headed over to Lowe's and purchased 2 cans of textured outdoor spray paint in a granite type of finish. I choose a natural shade so that it would blend in with all of my other outdoor decor.

Once I was back home I sprayed a coat of paint on each piece. I left it dry overnight. The following day...I sprayed a second coat. When spray painting you want to not stand too close to the item you are spraying or you will get drip & run marks. The objective is light and even coats!!!

After all pieces were dry we moved it onto one of our covered patios. It has a nice flat bottom (the bowl portion) and we decided to sit a flower basket inside it. When entertaining...we can keep the flowers in it for a decorative piece or remove the flower basket and use it as a small side table.

If your bird bath doesn't have a flat bottom...then toss some gravel and stones into the bottom before pouring in your dirt or potting soil. You can directly plant flowers into it if you prefer doing it this way but make sure you have at least 2" of stone & gravel in the bottom to allow water to drain.

Another tip...I didn't add a clear sealer after I painted our bird bath because it is kept on a patio that has a roof. It is not sitting out in the yard in all kinds of weather elements. If you are going to keep yours outside and unprotected, I do suggest that you add a coat or two of clear sealant. Enjoy!
Thursday, June 11, 2015

The Beautiful Purple Bearded Iris

One of my favorite late springtime flowers happens to be the beautiful purple bearded iris. Although I love the other colors and varieties that I grow in my flower garden...this one is my absolute favorite when it comes to the Iris.

I had always thought that they were hard to grow but my great auntie taught me differently. They are one of the easiest flowers to grow and they bring a lot of color to your backyard garden. I personally have dark purple, light purple, peach, white and yellow ones growing here on my property.

My great auntie told me years ago that the older generation calls the Iris...Flags. I am not sure why because they certainly don't look like Flags to me! Furthermore, I am not sure why they refer to them as "bearded" either. Strange names some of our flowers get!

Here in south central Pennsylvania my Iris typically bloom the #2 and #3 weeks during the month of May. If we had a mild winter and get an early spring then we will see them blooming the first week in the month. On average, mine will bloom for 7 to 10 days.

A few weeks ago I shared some photos with all of you and some easy Iris growing gardening tips. You can refer to that blog post if you need to learn more about growing them in your own backyard garden.

Today, I just wanted to share a few more photographs with all of you of my Purple Bearded Iris that I didn't feature in my last flower gardening blog post. They are just so pretty and I am going to miss them until I see them again next year.

Saturday, May 30, 2015

7 Important Tips for Growing Iris Flowers in a Backyard Garden

Three years ago we planted some Iris in one of our flower beds and they didn't do well in that particular spot. Personally, I think they got way too little sun and that is why they didn't do good.

Last Fall we made the decision to dig them up and move them to a different area on our property. This new area gets sun about two thirds of the day and shade the rest. When we re-planted them we added in some good fertilizer and left them alone throughout the winter season.
I am happy to report that the new location and the addition of great fertilizer has made all of the difference! Two weeks ago these lovelies were in full bloom and looked beautiful. All twenty-one of them look extremely healthy and colorful. I am very pleased with how they are doing now.

Here are 7 tips for growing the Iris in your backyard flower garden.

1. They need a lot of sunlight and should be planted in areas that get a minimum of 6 hours of sunlight every day. In other words, a mostly sunny area in your yard.

2. Plant them about 14-16" a part and when planting them always inspect them for disease. If you see any worms or rot...discard them immediately.

3. When moving your Iris from one area of the yard to another you will want to do this in late summer or very early fall. Do not attempt to do this in late winter or spring. Once dug up, you will want to re-plant them within hours.

4. Don't over-water them! Iris' are not overly thirsty! They will need watered twice a week for the first 3 weeks after being planted. Once the 3 weeks are over with...only water them if you have had several very hot and dry days. Even then, water them lightly and don't soak them.

5. After they are done blooming for the season you can trim them back. You will want to leave 5-6" of foliage, so don't trim them down to where nothing is left!

6. I sometimes cut my blooms and make a nice indoor flower arrangement. When cutting fresh blooms you will want to cut them at an angle and leave 6" of foliage (stems) sticking out of the ground.

7. Different people have different recommendations for fertilizing the Iris. We do ours every other year. In addition...you should NEVER mulch around them because mulch retains water/moister which can cause the Iris roots to rot.

Iris' at times can be tricky to grow if the soil isn't in the proper condition and some varieties of Iris are sun-sensitive. Moving our's to a new location was definitely the right thing to do.

In about two weeks my Hydrangeas, Roses and Miniature Roses should be in full bloom and I will try to grab a few pictures of those and give you some tips on what I've learned about growing those over the past few years. Enjoy!

Wednesday, May 27, 2015

Backyard Gardening - The Beautiful Purple Iris

It's been awhile since I published an "Almost" Wordless Wednesday post. I had gotten out of the habit of doing one and going to try to get back on schedule and publish one every week.

Today I am featuring a photo that I took last week of a beautiful light purple IRIS in full bloom. I've got 5 flower gardens on my property and in one of them I planted about a dozen Iris bulbs last year and finally...they all bloomed! 

We had planted light purple, dark purple, peach and yellow Iris'. Once fall rolls around I am going to go out and buy some more bulbs and plant them before winter sets in. I absolutely love Iris' and they are one of the easiest spring flowers to grow. 

Well, there you have it! My "Almost" Wordless Wednesday photo and post for the week of May 27th, 2015. Do you enjoy flower gardening? If so, what is your favorite flower to grow?

Friday, May 8, 2015

Gorgeous Spring Flowers in Full Bloom

Gorgeous Tulip
I love gardening...both vegetable gardening and flower gardening. During the spring gardening season I love to see daffodils, hyacinths, tulips and azaleas in full bloom. While these are not highly fragrant flowers, they sure are beautiful.
Pink Azaleas
Here in Pennsylvania I can grow all kinds of flowers and typically I start seeing spring blooms the very end of March...depending on the type of winter that we had. This year though, I didn't see them blooming until the second week in April.
White Daffodils
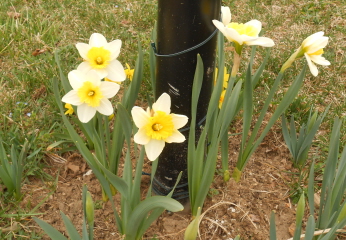
One of my very favorite spring flowers are the pure white daffodils. I planted these bulbs about 2 years ago and every year they get bigger and better. I do love yellow and yellow/white daffodils but the pure white ones are my absolute favorites!!! They have absolutely NO color them at all.
Pink Azaleas
We have 9 azalea bushes on our property in various shades of pink, rose, purple and dark red. When they bloom...they only bloom for about 2 weeks and then they are done. I guess you really consider them to be more of a flowering shrub than a springtime flower but nonetheless, I still enjoy them.
Red Azaleas 
Once Fall rolls around again we will be planting more tulips, lilacs and hyacinths so that I have some additional colors and varieties in my flower beds next Spring. After they are done blooming this season, they are all getting a much needed trim job and shaped up more nicely.

Friday, July 18, 2014

How to Use an Old Chiminea as a Flower Planter

Several weeks ago my neighbors were moving out of their home and tossed this old Chiminea to the curb. I had seen this outdoor fireplaces before but never thought about owning one because we have a fire pit.

Anyway, hubby saw it sitting at the curb and went over to ask them if we could have it. They gave it to us but left us know upfront that it had a hair line crack. That crack didn't bother us at all because we were going to clean it up and use it as a flower planter in our garden.

The old Chiminea comes in two parts...the base and the chimney portion. We separated them and gave them a good cleaning. To clean them up we used a product called Krud Kutter that easily removed all of the dirt, grime and soot. We then hosed them down with our garden hose and left both pieces dry in the sun for 3 days.

We then decided to seal them by spraying the outside of each piece with clear acrylic spray. You can find this in the spray paint section at your home stores and it comes in several different types of finishes. We chose the matte finish for our project and gave both pieces two coats of the clear acrylic finish and left them dry for 24 hours.
We then assembled the two pieces together. We measured the chimney opening and found a plastic flower pot at the home store that perfectly sits down inside it. We filled it with some good dirt and then placed several trailing plants inside it (along with a small mound of ornamental grass).

In the bottom of the Chiminea we used two plastic flower pots and turned them on their sides. Each one has several "trailing" type of flowers inside it. We also placed some river rocks into our base which helps to keep the flower pots (turned on their sides) from rolling around.

Now that it is finished...hubby moved it down into the backyard near our outdoor swing & flower bed. It really looks nice sitting there and it really adds so much needed color to that area in our yard. We are very pleased with how this turned out and we saved another item from going to the landfill! We love to upcycle and turn nothing into a pretty something! What a pretty addition to our flower garden!

Sunday, June 15, 2014

Beautiful Iris in Bloom - Flower Gardening

Two years ago my husband and I received several mature Iris plants to plant in our gardens. Our neighbors were moving out at the time and the new ones moving in were tearing up the yard and giving away all of these beautiful garden plants.

We got about 10 Iris' from them 2 years ago and planted them right away. Last year only two of them bloomed so we decided to really fertilize them good last Fall and early Spring and wow...what a difference that has made!

Right now all 10 of my plants are blooming and they are just beautiful! I want to get some more but in a deep purple or pink color if I can find them. The peach color is beautiful but I need to add some darker colors to my flower beds. 
The one thing we did learn about the Iris is that they enjoy a lot of sun. Matter of fact, the ones that we have in partial sun/partial shade are doing okay...but not fantastic (we are going to move them). The ones we have in a mostly sun area are doing fabulously! They are large, bright and very colorful looking.

They are great lining the edge of your sidewalk, fencing area or plant them around one of the sides of your house that gets a lot of sunshine. I just love how large (tall) they are and they really stand out among all of the flowers and flowering bushes we have near them. Beautiful!

If you love gardening, you can find some additional gardening posts right here on my blog in the gardening category and I will be posting a lot more. As I learn new things and things come in bloom or in-season, I will be posting about them. Enjoy!

Saturday, June 7, 2014

Growing Blueberries at Home

Blueberries on Bush
We moved into our new home 1 1/2 years ago and were pleasantly surprised to find 5 wild raspberry bushes on our property. We love fresh raspberries but we love fresh blueberries even more! After enjoying a fabulous crop of wild raspberries last year...we decided to go ahead and plant two blueberry bushes this year.

In late April we obtained two 2 year old blueberry bushes and planted them in our backyard about 3 feet a part. Once we planted them, we fertilized them, watered them and pruned them according to the instructions that came along with them.

The instructions stated that we wouldn't get any blueberries this year but would see them during the third year (next year). Well, those instructions were WRONG! Just 3 weeks ago we went out and saw that they were flowering and guess what? Now we have several unripe blueberries growing on our bushes!!!
blueberry bush
Please ignore the "weeds" you see in the photo above as we have had a lot of rain and the weeds got a little out of control. Matter of fact, as I type this hubby is outside taking care of those weeds for me. What a great guy he is!

In a few weeks I will make another post to let you all know how our blueberry bushes are doing but I can tell you...we are super excited that both bushes are doing so well. We only expect to get a handful or two of fresh blueberries and trust me, we will totally enjoy them!

I am already dreaming about homemade blueberry pies, bread, muffins, jam, jelly and of course...ice cream! Yay!

Wednesday, May 14, 2014

Spring Gardening - Tulips in Bloom

I love gardening...all types of gardening from growing herbs on my windowsill to planting flowers and vegetables in my garden. Every year we increase the size of our garden and this year will be the biggest one we have ever attempted.

Right now we have flower beds going around 1/2 of our house. Hubby did a beautiful job landscaping those areas last year and now his hard work is paying off. This spring we enjoyed a beautiful crop of white & yellow daffodils (3 different varieties), bleeding hearts and several varieties of gorgeous tulips.
Since our tulips that we planted last year did so well, we will be planting more tulip bulbs this year for bloom time next Spring. I love the wide variety of colors that you can get and the fragrance is fantastic! Tulips are one of the easiest spring flowers to grow!

I don't remember which tulip variety these particular ones are but we just love them! They get about 8-12" high and are two-tone in color...very vibrant color and the petals have frayed edges which really help them to stand out and look unique among our other spring flowers.

Next week I will share some photos of other flowers we are growing in our flower beds with all of you who are interested in Spring flower gardening. My one tip for all of you is to buy your bulbs in early September (North East Coast) and plant them in late September before you get your first frost. Then come late March, April and May (depending on our cold winters) you will see beautiful blooming flowers come springtime.

Wednesday, August 14, 2013

Refinished The Old Water Fountain & Bird Bath

Last year my neighbors moved out and were going to haul off this old water fountain & bird bath to the city dump! It was in terrible shape with numerous cracks, chips and didn't run at all. Seriously, I wouldn't of paid $5.00 for the thing!!!

However, my hubby saw the potential and they gave it to him for FREE...gosh, I love free! Anyway, last month he finally had some extra time and spent an entire month restoring it...matter of fact, we are told that it's even prettier now than it originally was 25 years ago!
He purchased plaster of Paris, caulk, grout, an air & water pump and several cans of outdoor spray paint that is in a gray granite type of finish. After spending 4 weeks...he finally got it restores and wow...it's beautiful now! Seriously, all of the neighbors are now jealous with it sitting out in our front yard in one of our many flower beds.

We have been working on all of our landscaping since we moved into the house 8 months ago and our landscaping is all coastal looking (the parts we have re-done) and we are still working on it. We love this bird bath combination water fountain because the bowl portion looks like a huge scallop seashell...don't ya think?

This fountain is super heavy and it took 3 men with a dolly to move it from the garage up to the front of the house! I bet it weighs a good 75 to 100 lbs...I kid you not! It's super heavy and consists of 2 pieces! Anyway, it's done and in it's new place!

Next up...the new hydrangea bushes are going in next week and then later next month the 2 new blueberry bushes will be put in along with another raspberry bush. I am very pleased with how our property is starting to look!

Thursday, August 1, 2013

Gardening - Can You Identify This Flowering Plant?


Back in January of 2013 we moved into our new home & have been working on our landscaping. We have been cleaning up the property, beautifying it and all kinds of other things. We have added brand new edging, two new bird baths, a new water fountain, an outdoor swing, 4 flower beds and a vegetable garden.

Well, last weekend I was down at the back of our property near the tree line and discovered this flowering bush aka plant. It's quite large if I must say so myself. Hubby weeded around it and it looks pretty healthy. The flowers are absolutely beautiful and we are enjoying our new found flowering plant or bush.

However, we don't know what kind of plant or bush that it is!!! Do any of you recognize this flower and if so, can you please tell us what it is? We do know that this flowering plant aka bush has been on the property for many years and blooms every Spring & Summer. We got that information from our neighbors but they don't know what it is either. I asked the previous home owner and she said she doesn't remember either and that her husband planted it for her about 9 years ago.

So, if you know what type of flower plant (bush) that this is...please leave me a comment! We are trying to learn more out about it. Thanks for your help!

Wednesday, July 10, 2013

Gardening - Petunias Gone Wild!!!


My "almost wordless Wednesday" post this week is a photo that I took last weekend of the Petunias in my front flower bed that have gone completely wild with their growth! We planted them in late May of 2013 and they were scrawny little plants with no blooming flowers. We got them at the garden store with a hefty discount since they looked terrible and weren't doing well.

We brought them home and immediately planted them. We then hit them with the garden hose and our favorite growth product "Miracle Gro" and continued to water them regularly and with the Miracle Gro once a week. Wow, what a difference 6 weeks makes and lots of love & care! Those Petunias are going WILD now and some are getting so large they look like flower bushes!!!

I absolutely love outdoor flowers and have 4 flower beds on our property. This particular flower bed has nothing but Petunias in it and I am loving how full and lush they are! Just goes to show you that you can bring a scrawny looking plant(s) back to life again with the proper love, care and nourishment (Miracle Gro) and they are doing fabulous now!!!

If you look closely, you can see one of my 12" tall solar garden lights buried in those Petunias which will show you how large they have become. I think this weekend I will trim some of them back as they are interfering with the solar lights getting enough sunlight during the day.

Well...there you have it...another "Almost" Wordless Wednesday post for this week!

Saturday, June 22, 2013

10 Tips for Planting Petunias in your Flower Garden


We love gardening and we have 4 flower beds and 2 small vegetable gardens that we have been working on this year. While our gardens started off small, they are all coming along nicely now.  In our one flower bed we planted nothing but beautiful Petunias. When we bought them they were quite small and none of them were even close to blooming.

Today, I wanted to share some Petunia planting tips with all of you that we learned along the way.

1. When buying petunia plants always buy healthy ones! Inspect them carefully and if you see any signs of disease, don't buy them! It is perfectly okay to buy them with no blooms and it's okay to buy them with blooms as long as they look healthy.

2. If the plants you are considering buying look wilted or have any funky odors coming from the plant or the soil the plant is sitting in...refrain from buying them! A flower plant should smell just like the flowers they are...any musty or moldy smells could mean that it's a diseased plant.

3. Your plants should be planted as soon as you get them home. If you can't get them into the ground right away, mist them with water so they stay hydrated. You do NOT need to flood them!

4. We buy our petunias in multi-packs and to make separation easier we like to lightly mist them and the soil with a water bottle. Wait a few minutes and they should separate for you a lot easier than trying to do it with stiff hard dry dirt.

5. We dig a hole that is about 4" to 6" deep and we place the petunia down into the hole along with the dirt it came in. We then use our regular soil on top of that. (the dirt they come in is very nutrient rich).

6. Once we have all of our plants in the ground we immediately water them with some Miracle Grow which helps them get off to a great start. We don't overly saturate ours with water but we do make sure that they get nice and wet.

7. We water our flowers and the vegetable garden every 3 days when we don't get any significant rain. Every week 7-10 days we water them with the Miracle Grow which keeps them nice & healthy and growing quickly.

8. Keep your flower bed weeded! We mulch around our flowers and then pull the weeds on the weekend which takes maybe 5 minutes since the mulch keeps the weeds at bay.

9. Keep animals out of your flower beds....if need be, put a small fence around the flower bed. Animal feces and urine can damage your flowers, especially the urine which contains ammonia.

10. If you notice your flowers are not doing well...try to solve the problem as quickly as possible. If you can't figure out the problem, dig them up and move them to another area before they get too shabby looking. Just make sure you dig around them, taking great care to not damage any of their roots.

Well there you have it...our favorite 10 tips when it comes to planting Petunias in your flower garden.


Wednesday, May 29, 2013

The Fabulous Grow Box for Container Gardening - My Update!


A few weeks ago I blogged here on my blog about the wonderful Grow Box that you can use for container gardening.You can find that blog post right here on my blog and I encourage you to check out that first post I made about the Grow Box.

Well, it has been 6 1/2 weeks since I planted two cherry tomato plants in my Grow Box and guess what? I got a slew of green cherry tomatoes that will be ripe and ready to pick in about 2 weeks. Not only that, I have been getting red ones here & there that hubby and I have already been picking and enjoying!

By using the Grow Box and planting our tomato plants in it in early April, our tomato plants are growing healthy and we got a head start on tomato growing season! Usually we don't start picking cherry tomatoes until late June so we are an entire month ahead of schedule which makes me extremely happy since I am a tomato lover!

I love my Grow Box so much that I plan on investing in several more of them come next Spring when I can get back to gardening like I usually do. (recovering right now from a total hip replacement, so my gardening is going to be limited this Summer).

Anyway, as you can see from my photo above, my two cherry tomato plants are doing extremely well. Make sure you check out my blog post from 6 1/2 weeks ago to see how far they have come. These Grow Boxes are the BEST THING for container gardening! LOVE THEM!

Monday, May 27, 2013

Beautiful Yellow Iris Flowers in Bloom


I love gardening and last Fall I picked up some Iris bulbs and decided to plant some of them in my flower beds and around the house near my front door. I have never planted Iris's before and I wasn't too sure how I would do with them, because our weather here in Pennsylvania can be finicky and harsh at times.

Anyway, I purchased purple, white, yellow and red Iris bulbs (some people call these flowers "FLAGS") and planted them back in late September. (really easy to plant and care for these flowers & they come back every year). As I always do, I tossed a layer of hay over top where I planted them to give them some protection during our harsh winter months.

Once winter was over, we removed our layer of hay and waited for all of our spring flowers to bloom. The first ones that came up & bloomed were our tulips, daffodils, grape hyacinths, hyacinths, lilacs and our 8 azalea bushes. The this past week I finally saw one of my Iris' blooming! Yay!

My Iris' range in size from 9" up to 1 1/2 feet in height and are doing well. So far, the only ones blooming are the yellow ones, but the purple, red and white ones should be blooming later this week. They all look healthy & beautiful and come fall...I will be planting more of them!

Once the other Iris' start blooming and looking lush in my flower beds, I will snap a few more pictures for all of you to see. I am really pleased with our new flower beds and how all of our new landscaping projects are coming along. Yay! I love gardening, don't you?


Saturday, May 11, 2013

My Azalea Bushes are in Full Bloom!!!


I have been really patient this year and have been waiting a few weeks for all eight of my Azalea bushes to bloom and finally this week they did it! They are all looking gorgeous thanks to Miracle Gro and all of them are full and lush!

We have eight bushes (3 red ones, 3 pink ones and 3 purple ones) and I am thinking about adding more red ones or white ones to the mix. I love how they look and how they smell when you walk around our house and yard. I am really excited that they are doing so well this year since they did so poorly last year. Wow, what a difference a year makes and a little Miracle Gro to help!

Next weekend we are going to get our flowers in (the annuals) and mulch around the house and flower bed. I am looking forward to that and can't wait to see the end result once we are done with that project. Once done with that, going to work on adding bushes between our property line with the neighbors to hopefully deter their dogs from coming over here to do their potty business which irritates us to NO END!

Yay! Thank you Spring for finally being here so that I can spend time outdoors basking in your warmth and sunlight! Have a great weekend everyone!

Sunday, May 5, 2013

Container Gardening with The Garden Patch Grow Box


I love gardening and this year I am getting a head start on my gardening by planting a few things into a container box. The exact name of the product I am using is called The Garden Patch Grow Box and it's one of the most unique growing systems I have ever seen or used!

I received one of these gardening growing boxes as a review item for my other blog ~ The Two Classy Chics Blog, so you can head on over there to read my full review on this product and to see all of the photos.

The grow box took us less than 5 minutes to assemble and another 5 minutes to put our potting soil in, 2 tomato plants and to fill up the bottom well with fresh water. In less than 10 minutes, we were done and had 2 nice tomato plants growing inside our Garden Patch Grow Box!

In a few weeks, I will make another blog post here on my blog and show you photos of how my tomato plants are doing. I am really excited about getting this head start on my gardening this year. In about 2 weeks...our backyard garden will be going in too! Yay!

Do any of you do any type of gardening? We enjoy both container gardening and traditional gardening and this year...our backyard garden will be twice the size it was last year. I am really excited about that! ~ Happy Gardening!


Thursday, April 18, 2013

Beautifying My Front and Back Yards with Scotts Gardening Supplies

This is a Sponsored post written by me on behalf of Scotts Miracle-Gro for SocialSpark. All opinions are 100% mine.
 photo 6d50af2c-aba7-44e2-b0ed-d3510804d726_zps3aae88a5.jpgDuring the Spring, Summer and Fall season, hubby and I spend a lot of time outdoors. We have 2 flower beds in our front yard, a flower bed in our back yard and 1 small & 1 large vegetable garden bed. We love being outside and this year we are really excited about expanding and beautifying our outdoor spaces.

Our Spring flowers are doing really nicely this year and the only thing left to do is add some mulching. I need to get out to my local home improvement store and pick up some additional gardening supplies as we want to try some sustainable gardening this year.
My brother lives in Florida and is interested in using the Scotts Florida Select Natural Eucalyptus Mulch which sounds really cool. This Natural Eucaplyptus Mulch is substainable, natural and grown in Florida. It is substainable because it grows back 4 times faster than Cypress. It is made from plantation-grown Eucalyptus trees and is guaranteed to be free of waste and fillers.

What is really nice about this type of mulch is that it helps to keep weeds away, concerves soil moisture and helps to moderate your soil's temperature. Since it is locally grown in Florida, it helps to support the local and national economy and buying U.S.A. made products is important to me.
It's really easy to use and all you need to do is spread it 3" deep. They do recommend that you don't put it up against your house foundation, tree trunks or other wood structures. You can use it near those things but don't put it up right against them.

You can use the mulch around trees, in your flower beds, around your bushes or in your vegetable garden after your plants have sprouted out of the ground. I had never thought about using it in my veggie garden but that is a great idea for sure!
A 2 cu. foot bag will cover the following area: 2" depth it will cover 12 sq. ft. of bedding, 3" depth it will cover 8 sq. ft. of bedding and at a depth of 4" it will cover a bedding area of 6 sq. ft. I love that I don't need a truck load of mulch and can just buy a few bagfuls of it as I need it.

Deep Forest Brown photo ScreenShot2013-04-04at13636PM_zpsf0e45903.pngSince I don't live in or near Florida, I am looking to purchase the Scotts Nature Scapes mulch which comes in 3 colors: black, red and deep forest brown. I think we will go with the deep forest brown as I think that looks more natural. This mulch is natural and comes in a variety of textures. It helps to maintain moisture, prevent weeds & create a nicely looking groomed landscape all year long! Fantastic!

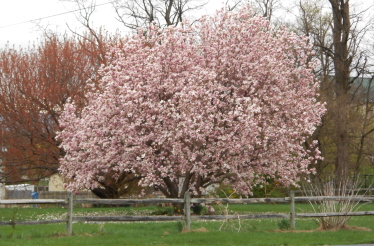
As you can see from my photos today....my flower beds still need some work! The flowers are beautiful and my blooming trees are beautiful but they definitely need some multching done. I think I will add that to our gardening to-do list for this weekend.

Do you like to garden? If so, are you a flower garden, fruit garden or a veggie garden type of person? Do you use mulch and if so, do you have any mulching tips to share with us?


Visit Sponsor's Site